Less boring hand strength exercise with Arduino
CAUTION: Training too much with too heavy weight can cause serious injuries (as I experienced recently…)
Since I am a kind of rock climber hand strength is a real important issue for me, so I have a lot of hand strength trainers, but they’re all so boring in use.
Also people who use these things for rehabilitation purposes can be a little bit more entertained.
So I thought why not display (the output of) your exercise to a computer monitor and do some eye-catching or challenging stuff with it.
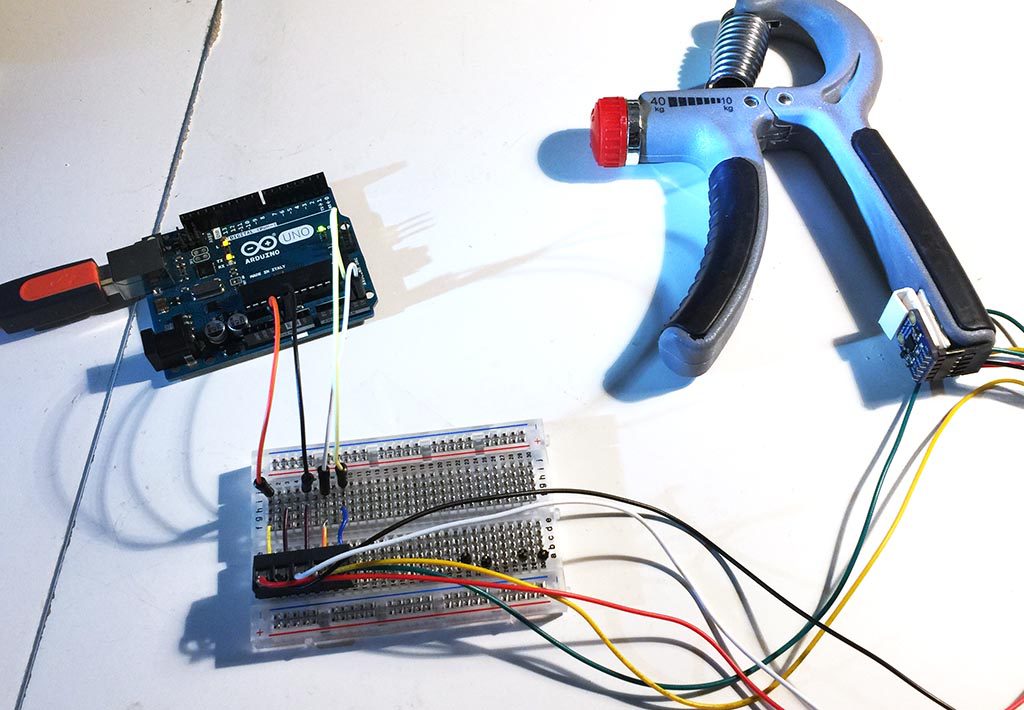
Therefore I needed a promity sensor, some wire, and of course my Arduino.

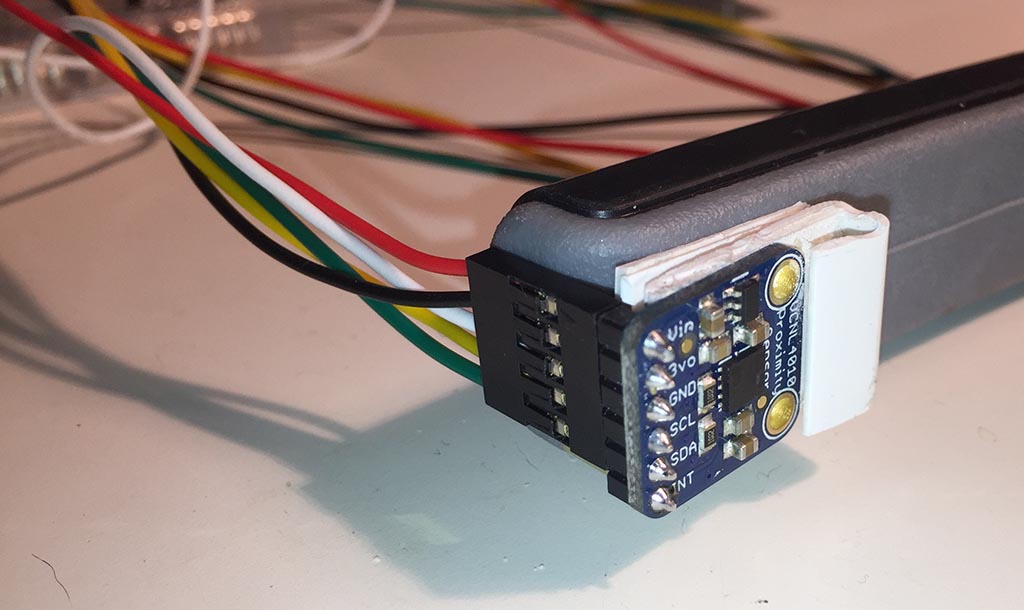
I needed a proximity sensor for little distances, this should be the Adafruit VCNL4010.
I attached it to this relatively easy handtrainer made by Tunturi. For rehab purposes an even lighter trainer is advised.
The sensor needs to be removable, therefore I used some velcro and some plastic pieces attached to the handtrainer with double-glued foam tape. The L-shaped plastic can be bought at a DIY shop.
This L (or U-) shape is essential to prevent the sensor from being damaged by too strong hands 😉
Attach the wires as follows (Arduino > VCNL4010):
5V > Vin
GND > GND
A5 > SCL
A4 > SDA
The Arduino code (thanks to Adafruit example-pages):
#include <Wire.h>
#include "Adafruit_VCNL4010.h"

//const int sensorPin4= 4; //Sensor pin connects to analog pin A0
//const int sensorPin5= 5; //Sensor pin connects to analog pin A1

Adafruit_VCNL4010 vcnl;

#if defined(ARDUINO_ARCH_SAMD)
// for Zero, output on USB Serial console, remove line below if using programming port to program the Zero!
 #define Serial SerialUSB
#endif

void setup() {
// pinMode (ledPin1, OUTPUT); //sets digital pin 12 as output
// pinMode (ledPin2, OUTPUT); //sets digital pin 11 as output
// pinMode (sensorPin4, INPUT); //sets the analog pin 4 as input
// pinMode (sensorPin5, INPUT); //sets the analog pin 5 as input

 Serial.begin(9600);
 //Serial.println("VCNL4010 test");

 if (! vcnl.begin()){
// Serial.println("Sensor not found :(");
 while (1);
 }
 //Serial.println("Found VCNL4010");
}


void loop() {
 //Serial.print("Ambient: ");
 Serial.print(vcnl.readAmbient());
 Serial.print(",");
 //Serial.print("Proximity: ");
 Serial.println(vcnl.readProximity());
 delay(100);
}
Note: in this example 2 serial port data-streams are outputted from the Arduino.

In Processing you can do nice graphic stuff with the data coming from the serial port.
..to be continued